Showing posts with label gradient. Show all posts

Thursday, June 12, 2014

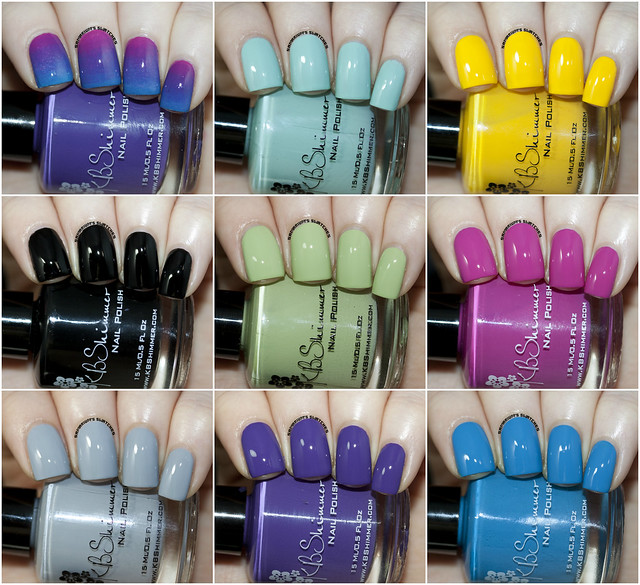
KBShimmer 2014 Spring Collection - Swatches & Review


Hey guys! Today's post is half of the Spring Collection from KBShimmer!
Today I'm posting the creme shades, and I will try to get the others up very soon.

I know I'm super behind on these since you know, it's summer now...I know I've been such a fail blogger this year.
I do really appreciate those of you who hang in there with me though, you guys are the best. <3

Scroll down to see these absolutely gorgeous creamy shades from KBShimmer!
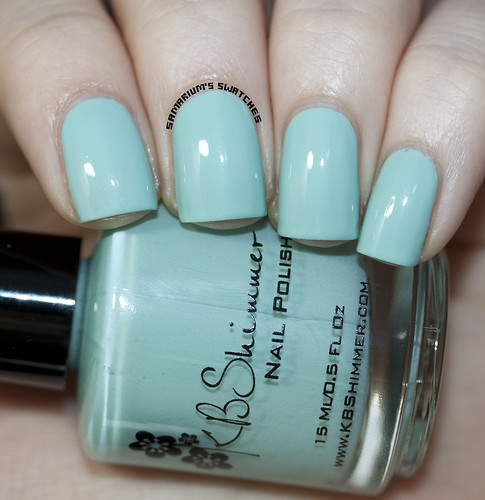
KBShimmer A Touch Of Glass
A Touch Of Glass - Three coats.

A Touch Of Glass is a light aqua mint with hidden shimmer.
Went on a bit sheer and streaky but builds up well.
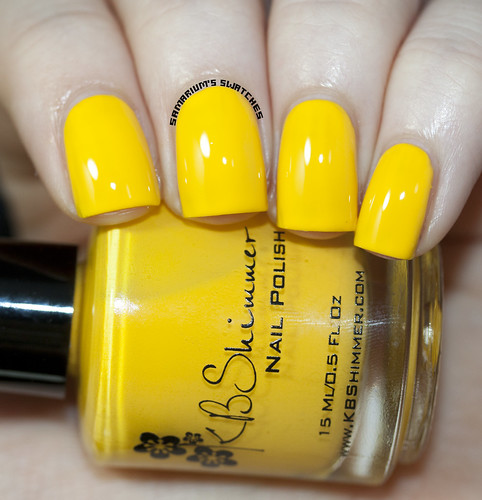
KBShimmer Chick Me Out
Chick Me Out - Three coats.

Chick Me Out is a bright yellow creme.
The formula was kind of slightly streaky but built up nicely. Well worth it!
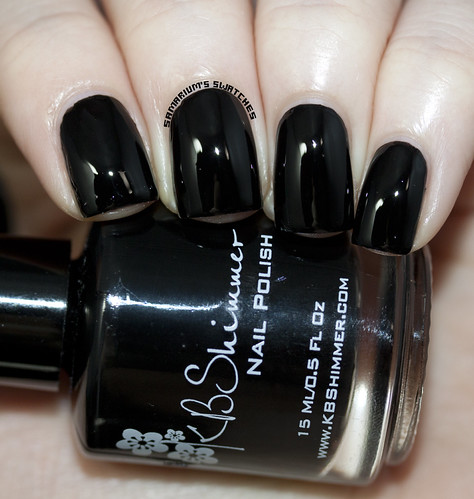
KBShimmer Eclipse
Eclipse - Two coats.

Eclipse is a super shiny black creme.
The formula was really great, went on smooth and easy.
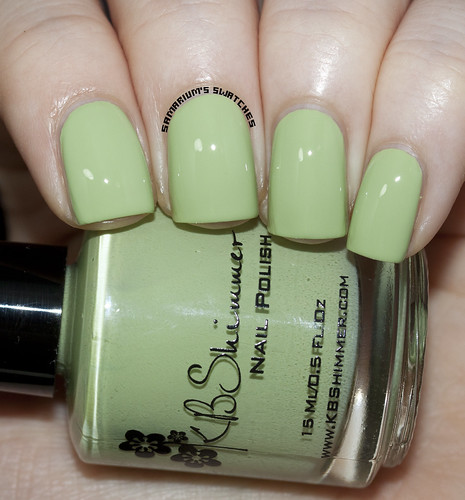
KBShimmer Honewdew List
Honeydew List - Three coats.

Honeydew List is a dusty pastel green creme.
Same as A Touch of Glass here, a bit sheer and streaky but buildable.
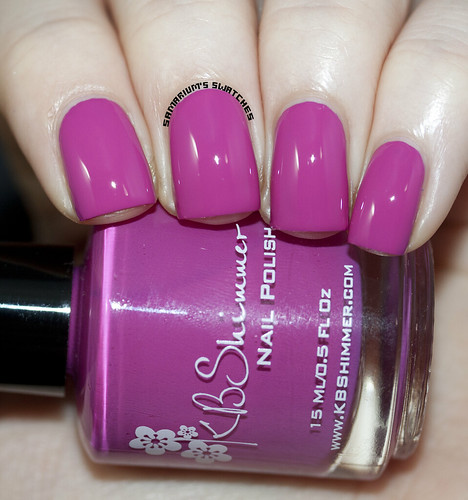
KBShimmer Life Rose On
Life Rose On - Two coats.

Life Rose On is a vivid cerise pink creme with blue undertones.
The formula was phenomenal, one of the very best int his collection.
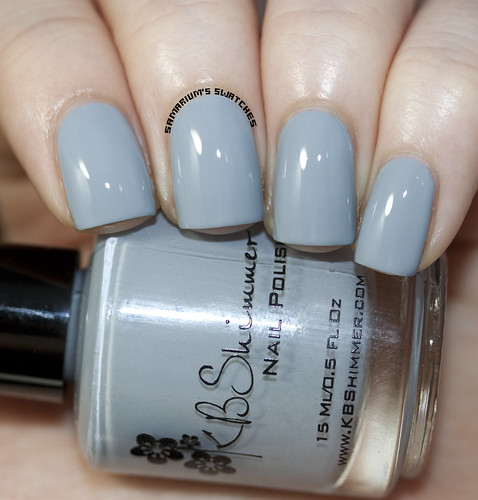
KBShimmer My Life's Porpoise
My Life's Porpoise - Three coats.

My Life's Porpoise is a neutral light grey creme polish.
Goes on really nice and smooth, could definitely be a two coater.
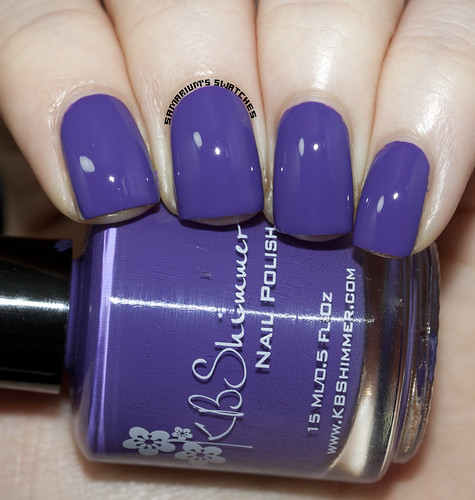
KBShimmer Pansy-Monium
Pansy-Monium - Two coats.

Pansy-Monium is a medium purple creme with red undertones.
This shade went on easily - very smooth and it is super stunning!
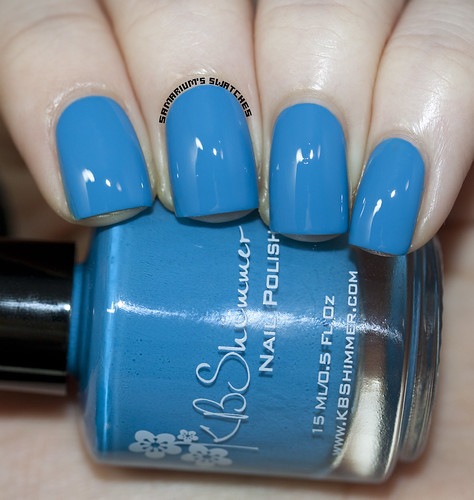
KBShimmer Sky Jinks
Sky Jinks - Two coats.

Sky Jinks is a medium but bright blue creme polish.
This one was another with a phenomenal formula, goes on easy breezy!
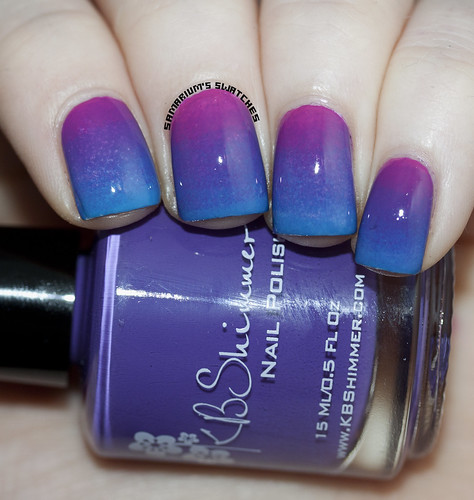
KBShimmer Spring Gradient
This gradient was done with a sponge and Life Rose On, Pansy-Monium, and Sky Jinks.

________________________________________________________________________

A few of these were a bit sheer but they all applied nicely. I can't even express how much I love these!
You will see the others soon, but this is such a good overall collection! This is one of my favorites from Christy.

I have some fun nail art I did with a few of these also! Keep an eye out for that tomorrow!
My absolute favorites are A Touch of Glass, Chick Me Out, and My Life's Purpoise!
But I love each and every single one of them and see myself using them frequently!

You can purchase this collection, and others from https://www.kbshimmer.com/.
The cremes sell for $7.50 each.

Also check out KBShimmer on Facebook, Instagram, and Twitter!
KBShimmer Spring 2013 Part 1 (1)

Have you purchased any polishes from this collection?
If not are you planning to, or lemming any? Let me know!


Friday, May 16, 2014

Milani 2014 Gold Label Nail Lacquers - Swatches & Review


Hi guys! How are you all doing? What are you guys up to this weekend?
I'm still doing well, just trying to stay motivated with my health kick lately!
Not doing too shabby, 7 lbs down! And my belated Mother's Day gift will get here today!
It's an elliptical :D Not exactly a very fun gift but one I wanted really bad that will be really useful for us both.

Today's post is featuring the 2014 Milani Gold Label polishes!
You guys have probably already seen these a bunch and a long time ago,
but I swear I'm trying to catch up and stay motivated in all aspects right now! :)

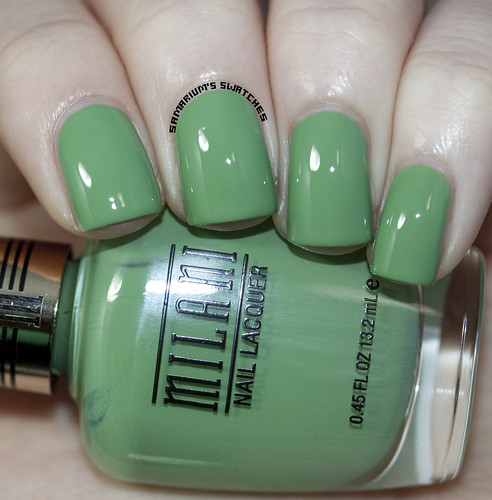
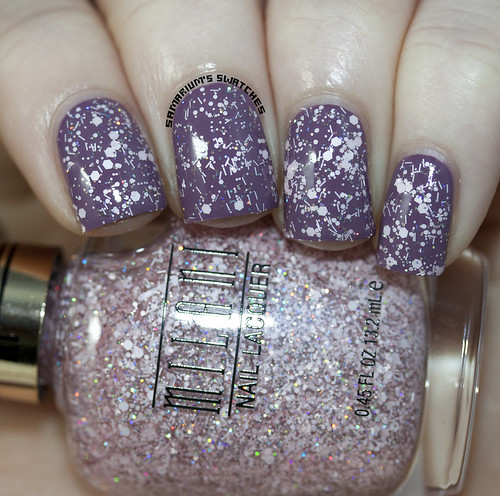
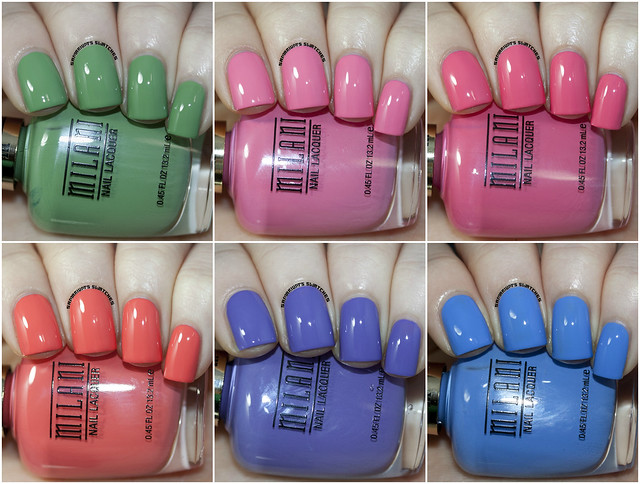
Milani Showy Sea-Green
Showy Sea-Green - Two coats.

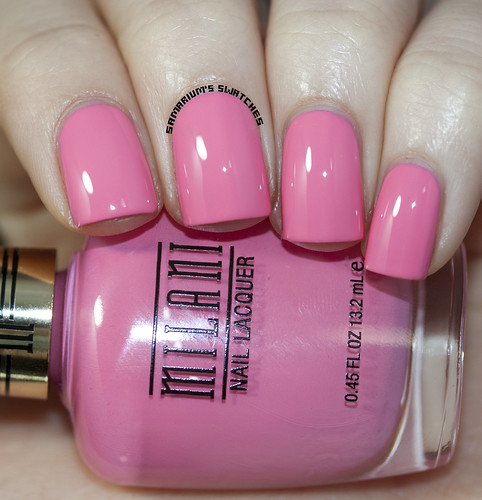
Milani Popping Pink
Popping Pink - Three coats.

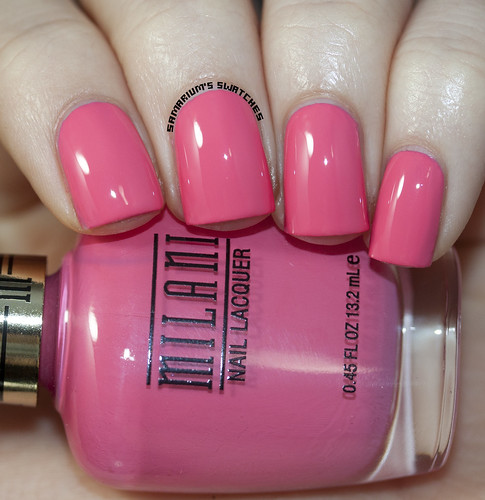
Milani Splendid Strawberry
Splendid Strawberry - Three coats.

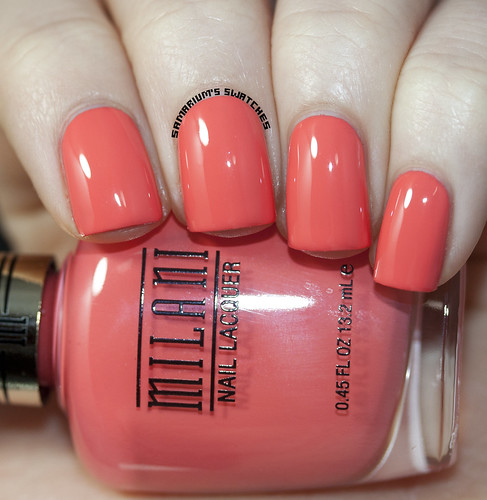
Milani Colorful Coral
Colorful Coral - Three coats.

Milani Vivid Violet
Vivid Violet - Two coats.

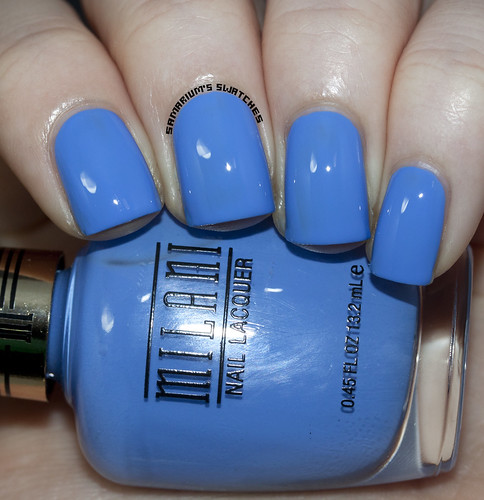
Milani Powerful Periwinkle
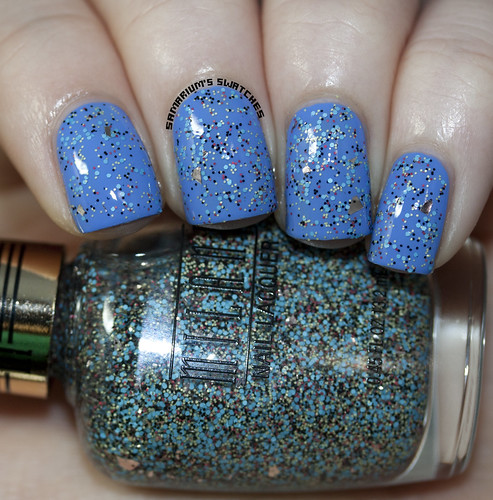
Powerful Periwinkle - Two coats.

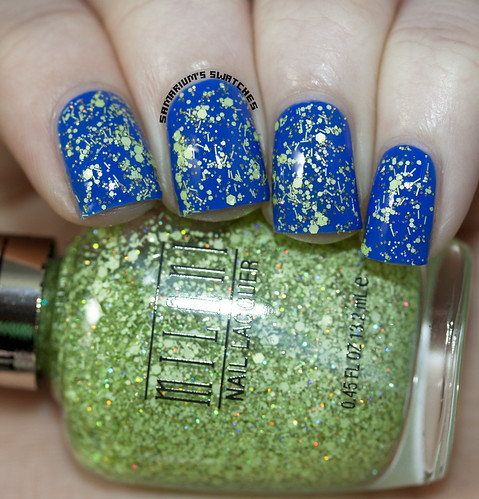
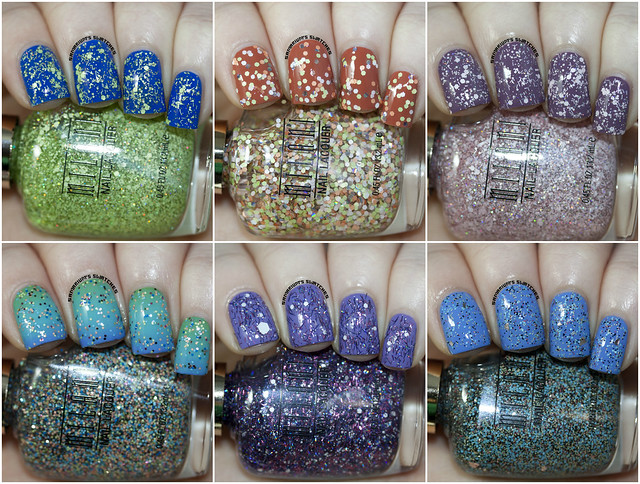
Milani Sugar Coated (1)
Sugar Coated - One coat over Milani Blue Zoom.

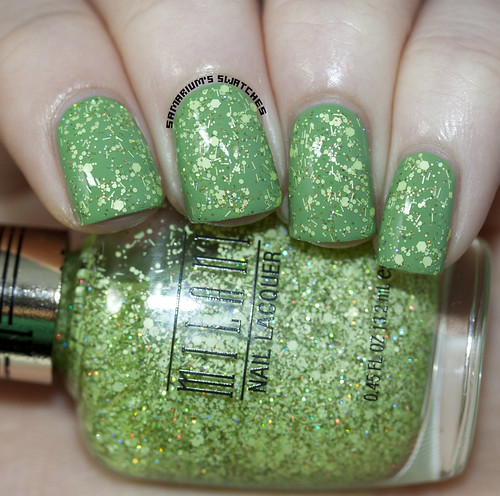
Milani Sugar Coated (2)
Sugar Coated - One coat over Milani Showy Sea-Green.

Milani Sugar Rush
Sugar Rush - One coat over Milani Canyon Country.

Milani Sugar Burst
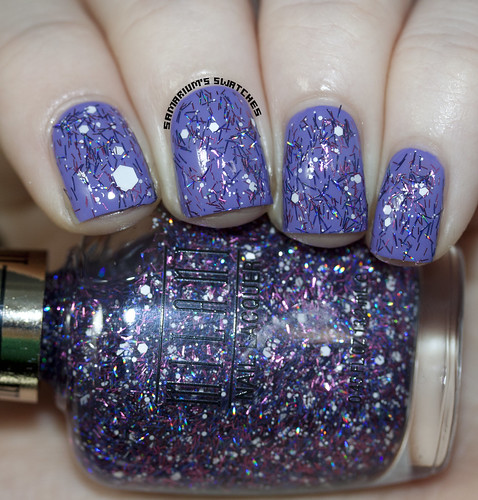
Sugar Burst - One coat over Milani Heather.

Milani Sugar High
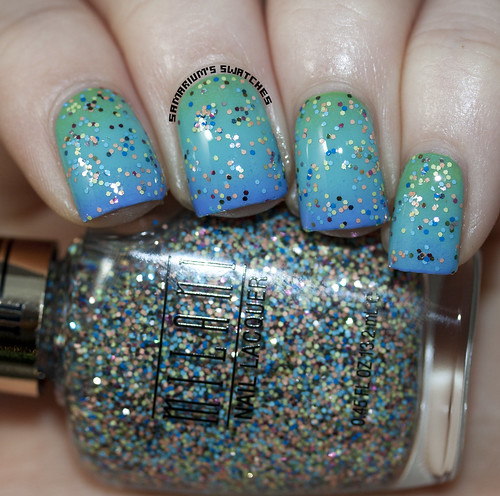
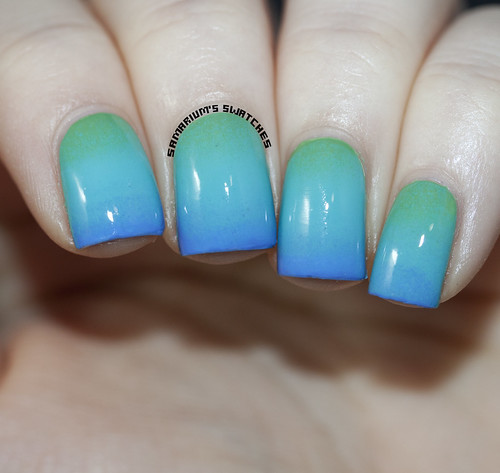
Sugar High - One coat over a gradient made with Showy Sea-Green, Aqua Brisk, and Power Periwinkle.

Milani Sugar Cane
Sugar Cane - One coat over Milani Vivid Violet.

Milani Sugar Rim (2)
Sugar Rim - One coat over Milani Power Periwinkle.

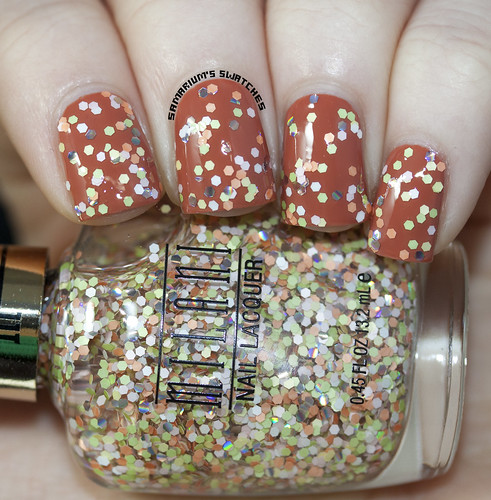
Milani Sugar Rim (3) Milani Sugar Rim Matte
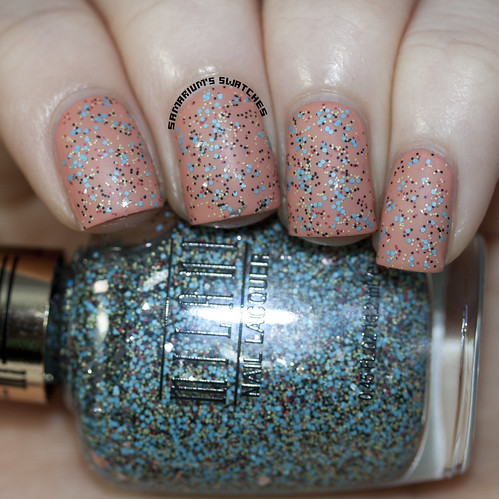
Sugar Rim - One coat over Milani Peach Innocence, topcoated and mattified!

______________________________________________________

I love the cremes in this collection so much! Since I use very thin coats a few needed a third coat.
But I think that they are definitely do able with two thicker coats.

I like all of the glitters with the exception of Sugar Cane. I can get behind bar glitter on occasion but...
This polish just doesn't do it for me. Sugar Rush is a little sparser than I'd prefer but I love the glitter combo in it.
The rest had really great coverage and dispersed really well.

My favorites are Colorful Coral, Splendid Strawberry and Sugar Rush!
The glitters aren't anything to go crazy over but they are nice.

Be sure to follow Milani on FacebookInstagram, and Twitter.

Milani Gradient with Showy Sea-Green Aqua Brisk and Power Periwinkle
Here is a picture of the gradient that is under Sugar High above.
 I just love how this gradient came out so much, It was even prettier in person!

Milani 2014 Gold Label Nail Lacquer (1)

Milani 2014 Gold Label Nail Lacquer (2)

Are you guys digging any of these shades? I love the cremes so much, they are so bright and summery!


Thursday, April 17, 2014

Pastel Easter Gradient


Hi guys! I'm really excited about today's post! Which is a big deal since lately I just haven't been as excited about blogging, polish or anything really. I just couldn't wait to share my Easter manicure with you guys!

I really hope you guys like it as much as me! I think it's perfect :D I'm so obsessed with gradients lately.

Also my Blogiversary is coming up on the 22nd! I really wanted this year's giveaway to be on time but I haven't received everything for it yet, but hopefully it'll be up before the end of the month! I will keep you guys updated!

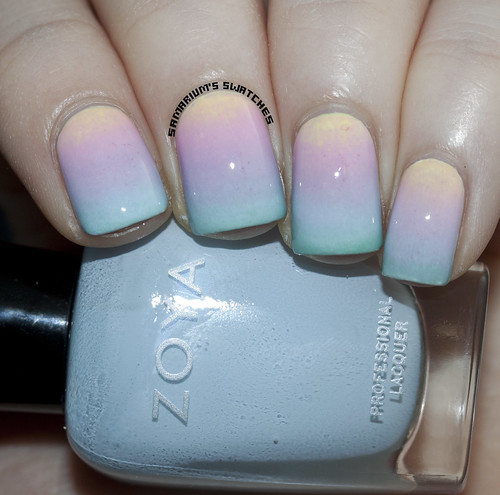
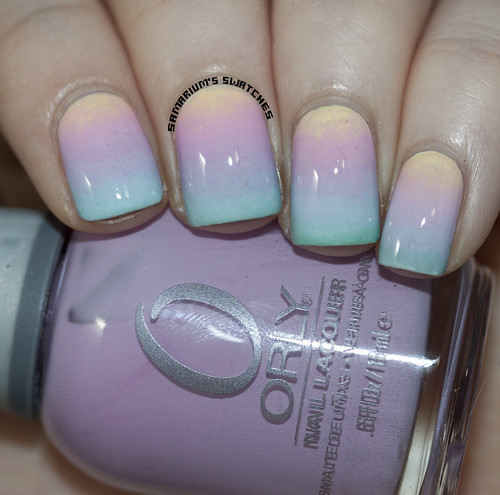
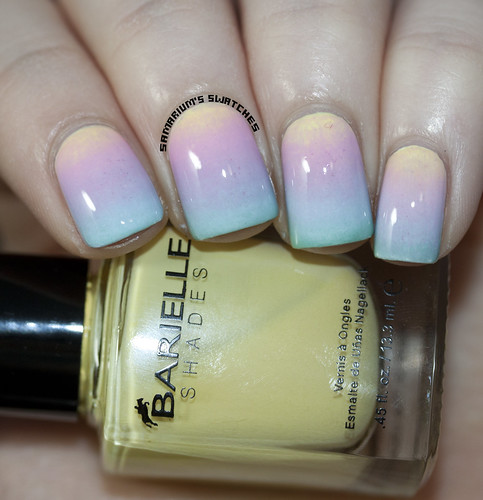
Pastel Gradient Easter Gradient (2) Easter Gradient (3)
For this gradient I used the sponge method (painting strips on polish onto the sponge and smushing it on the nails) I used the following colors over a white base.

Barielle - Banana Drop, Barielle -Pink Flip-Flops, Orly - Lollipop, Zoya - Blu, and Bondi - Lady Liberty.
Barely of  Lady Liberty even got on the nail though. I used too many colors lol!

After that I was trying to decide what to put on top, between China Glaze Fairy Dust,
Lynnderella Connect the Dots, Elevation Haba Xueshan or nail stamping. I chose Haba Xueshan!

Friday, February 7, 2014

Liquid Sky Lacquer - Swatches & Review!


Hi guys, Happy Friday! I hope you are all having fun tonight and this weekend!
I'm not really up to much, spending the night at home playing video games and watching some movies!

This evenings post is featuring a indie brand that I've never tried before - Liquid Sky Lacquer!
I hope you guys enjoy this post! Let me know what you are all up to this weekend! 
Liquid Sky Lacquer (3) Liquid Sky Lacquer (2)

Tuesday, December 31, 2013

My 13 Favorite Mani's of 2013!


Hi guys! Happy New Years Eve! Sorry I'm so late to getting to my 2013 Favorites posts!
Today's post is my 13 Favorite Manicures from this year!

My Top 13 for Indies and Mainstream polishes will be up soon, so be on the look out!
Those will likely go up after New Years though! :)

There is a link below each photo to see each post and all the products I used!
Here they are in order of most recent to oldest!

13 Fav Mani's of 2013

Tuesday, November 19, 2013

Sephora Formula X Hyped, an Ombre and a Gradient!


Hi guys! Here is a quick post before my review!
I used these manicures as "undies" for the new Polish Revolution collection.
I thought I should post them before the review to avoid bulking up that post :)

Sephora Formula X Hyped
Sephora Formula X Hyped - Three coats.

This isn't a review post but I want to say really quickly that I was disappointed in this formula.
Definitely manageable, nothing too difficult but I guess I expected more from Sephora!
It just didn't apply very evenly. The formula was kind of a let down, but the color is gorgeous!

Gray Ombre
The colors used for this Ombre:
Finger Paints Stunning Stilettos, Zoya Kelly, Zoya Petra, and A England Camelot.

IMG_7968
And for this gradient I used Zoya Breezi, NOPI Khloe Had A Little Lam Lam, and China Glaze Holly Day.
I sponged them over a white base using the sponge painting method.


Okay be prepared to see these layered on and even more gorgeous!


Sunday, September 29, 2013

Breaking Bad Nail Art! Yeah, BITCH!


Hey guys! Any other Breaking Bad fans excited and sad today? I know I am!
Such a weird mixture of emotions lol!

So last night I was procrastinating, I didn't feel like painting my nails or swatching but then I was like..
Why not do Breaking Bad nail art for the finale?! It's been on my nail art to do list anyway!

Man I haven't done nail art in a while, It's crazy how fast I get that "rusty" feeling.
So these are far from perfect but hell it was a last minute decision at like 2 am and I did my best :) Enjoy!!

Breaking Bad Nailart (1) Breaking Bad Nailart (2)


Thumb: The Los Pollos Hermanos Logo, except just the chicken heads
(There is no way I could have for their entire bodies! Heck their heads aren't even recognizable lol!)
Polishes I used:  Zoya Pippa, Jancyn, and Thandie along with Sparitual Clay. I used those for the gradient! I also used Milani White on the Spot. The rest was acrylic paints.

Pointer & Middle: The Breaking Bad show Logo!
Polishes I used: Essie Mojito Madness topped with Elevation Polish Wuyi Mountain as the base color.
Chin Glaze Holly-Day and Milani White on the spot for the logo.

Ring: Heisenberg! (I saw this tutorial here!)
Zoya Phoebe topped with Mosheen as the base. I used black acrylic paint to draw Heisenberg.
I kept screwing up on him so I actually painted him onto a pain stamper and made a decal :)

Pinky: The Golden Moth Chemical Logo that is on their Methylamine Barrels.

I used a combination of Black and yellow acrylic paint with A England Camelot and Zoya Pippa!

______________________________________________________

Who else can't wait for the finale? I can't wait but at the same time I don' want it to end :(
I rewatched the whole show in the past few weeks and I'm even more sad now lol!

I hope you guys enjoyed this post and I hope you all have a A1 day!


Also, 
Please refrain from leaving spoilers below for those who haven't seen the show!


*Some products in this post were sent to me for the purpose of a 100% honest unbiased review.*

Monday, July 29, 2013

piCture pOlish Blogfest 2013!

Hey guys! It's that time of year again - piCture pOlish Blogfest!!
This year everybody will be doing nail art with the shades provided,
I can't wait to see what everyone comes up with!!

piCture pOlish Blogfest 2013 Nail Art (1)

Here is the nail art look I came up with! But before I get into how I made this look,
and my very first video tutorial attempt These are the three shades I used!

piCture pOlish Heavy Metal
Heavy Metal  - Two coats.
piCture pOlish Honey Dew
Honey Dew - Three thin coats.
piCture pOlish Hot Lips
Hot Lips - Three very thin coats over White.
_______________________________________________________

Here is my tutorial, my very first one so yeah it's super far from perfect!
There is also a pictorial thing below int his post!


IMG_2086
Here is everything I used!

piCture pOlish Blogfest2013 Tutorial


  • Step 1 -
    Start with nail strengthener and base coat. I used Nailtek II and Orly Bonder.
    Then apply your base colors. I used Honey Dew on my ring & thumb nails.
    I applied a white base to my pointer, Hot Lips on my middle nail, and Heavy Metal on my pinky nail.
  • Step 2 -  
    Frame your pinky nail using Hot Lips and a small nail art brush.
    Draw a X shape on your ring nail using Hot Lips, then fill in the sides.
    Draw a triangle on your middle nail using Honey Dew.
  • Step 3 -
    Reapply Hot Lips to your "framed" pinky nail and the sides of the X on your ring nail for opacity.
    Using a small nail art brush and Heavy Metal, fill in the triangle areas on your middle & ring nails.
  • Step 4 - 
    Apply Honey Dew and Hot Lips to a wedge makeup sponge and apply to your white pointer nail.
    Repeat this process 3-5 times until your desired look is acquired!
  • Step 5 -
    Using top coat and a wax pencil (or whatever you use to pick up studs and rhinestones)
    pick up the studs one at a time and apply to your pinky and ring finger nails.
    I used a 2mm circle neon pink stud on my pinky nail and a 2mm black square stud on my ring nail.
  • Step 6 - 
    Use a small clean portion of the same wedge sponge you used above and dab Heavy Metal
    onto your thumb nail. Once dry apply topcoat to all of your nails and you are good to go!

piCture pOlish Blogfest 2013 Nail Art (2) piCture pOlish Blogfest 2013 Nail Art (3) piCture pOlish Blogfest 2013 Nail Art (6)


Make sure to follow piCture pOlish!
See other Bloggers Blogfest mani's on the Pinterest board here!

You can follow piCture pOlish via Facebook, Twitter, Pinterest, YouTube & Instagram!

To learn more about piCture pOlishes Shipping Policies, Network, and Deals check out https://www.picturepolish.com.au


*Products in this post were sent to me from piCture pOlish.*