Tuesday, July 30, 2013

Milani Fantastical Plumage - Swatches & Review!

Hey guys! Before I get into today's post you should go check out the guest blog post I did over at Refined & Polished!!

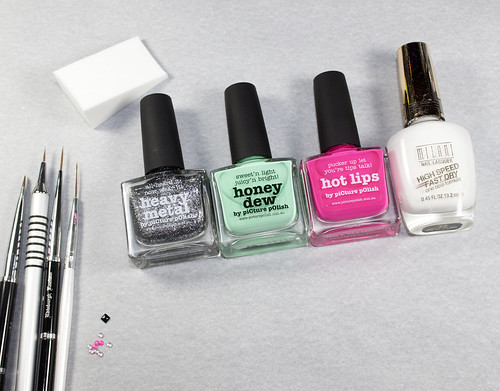
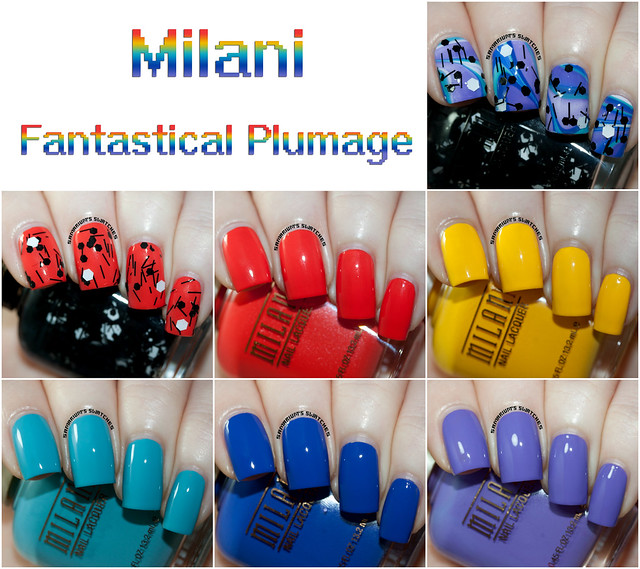
And as for today, I have the Milani Fantastical Plumage Collection to show you all!

*Products in this post were sent to me for the purpose of a 100% honest unbiased review.*
Milani Scarlet Ibis
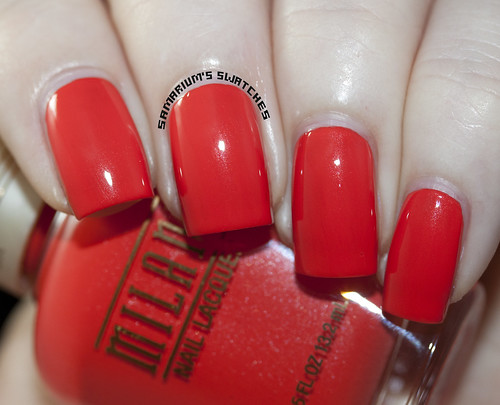
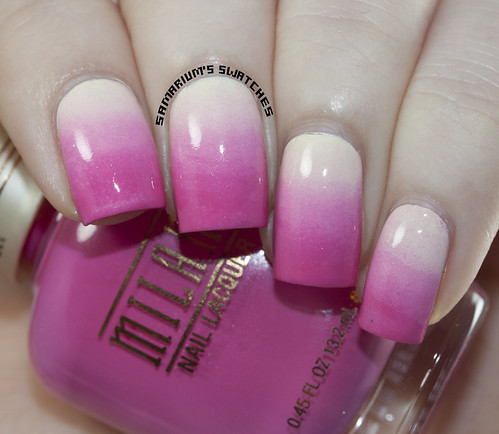
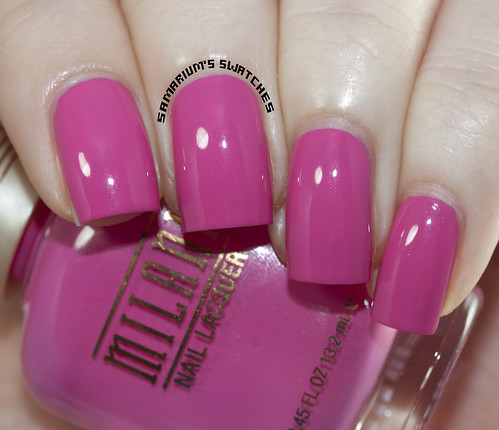
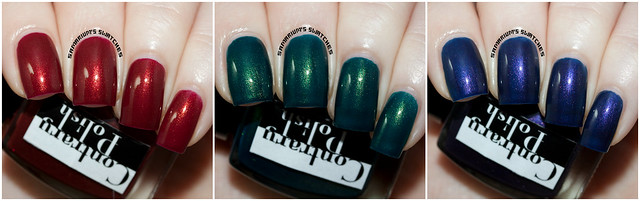
Scarlet Ibis - Three coats.


Milani Canary
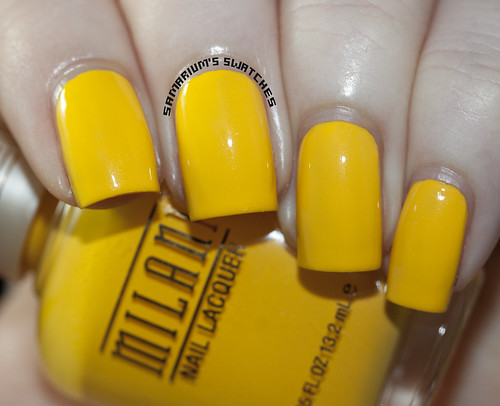
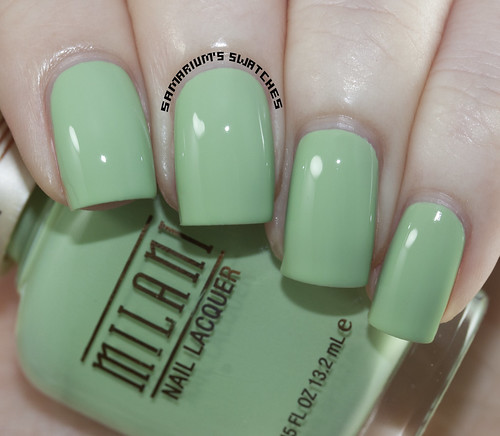
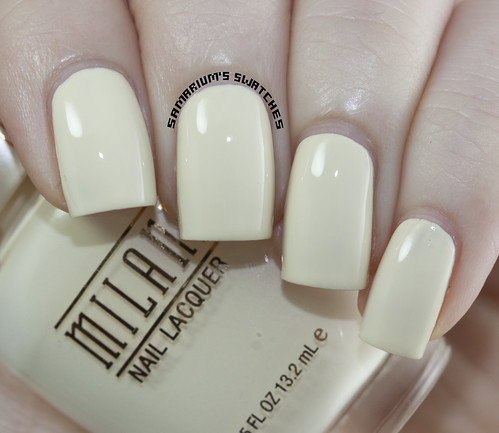
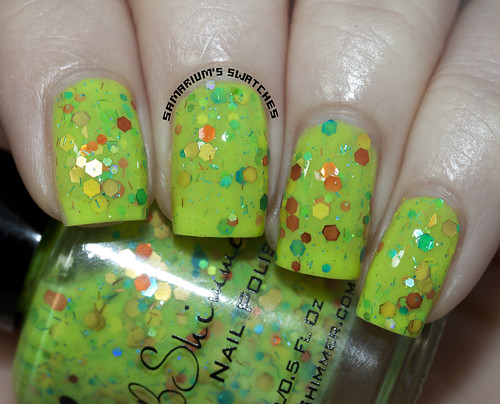
Canary - Three coats.

Milani Peacock
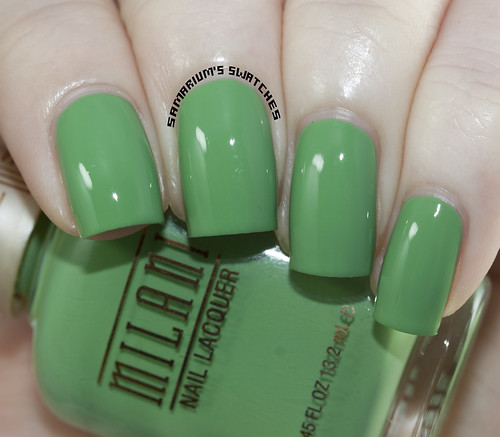
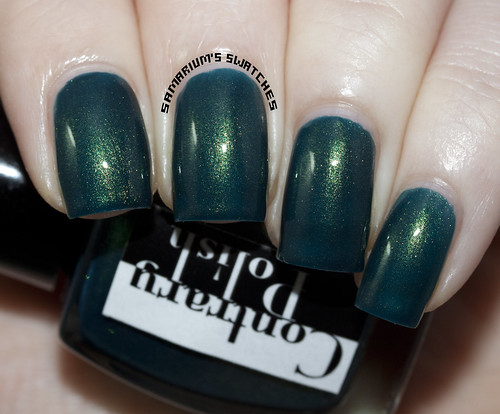
Peacock - Three coats.

Milani Blue Jay
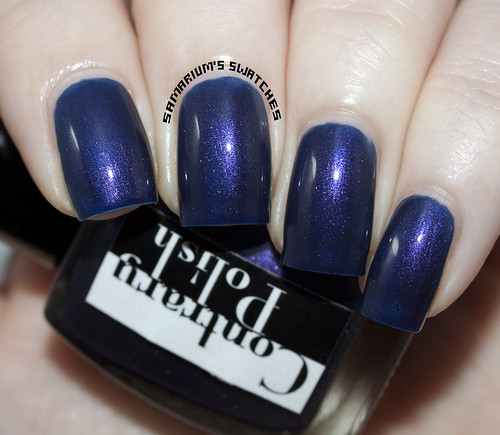
Blue Jay - Two coats.

Milani Purple Martin
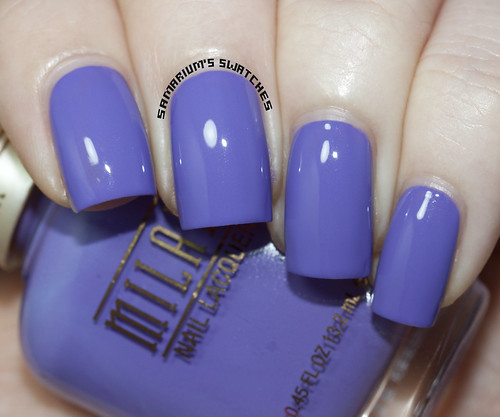
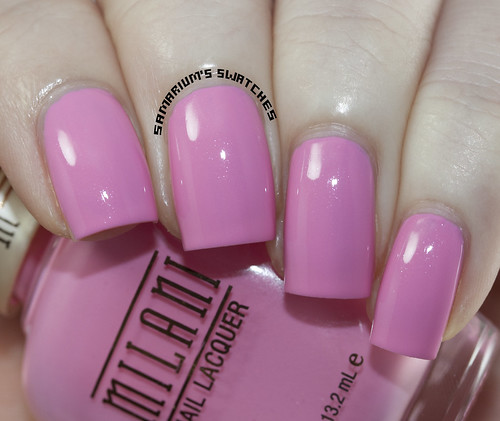
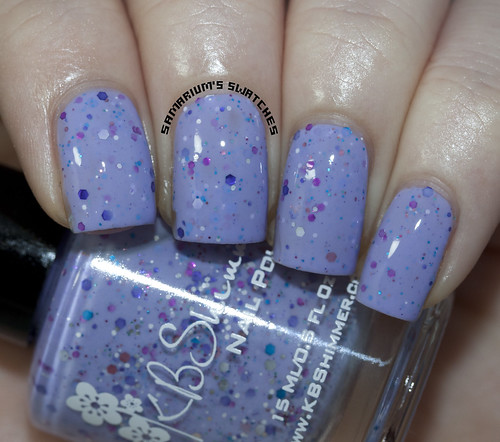
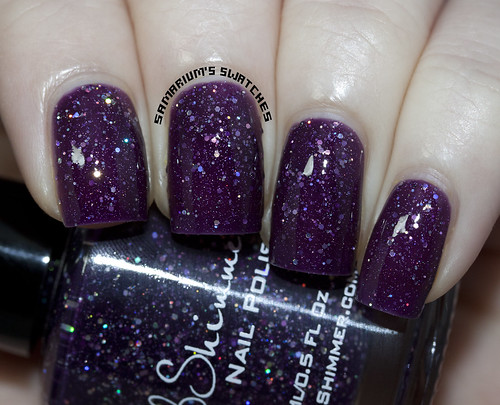
Purple Martin - Two coats.

Milani Carnival
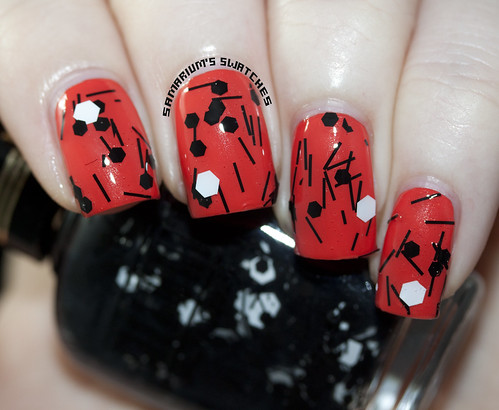
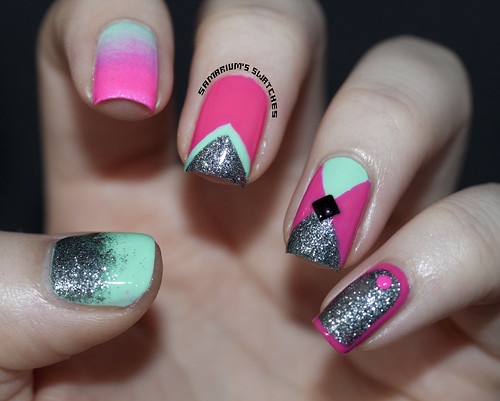
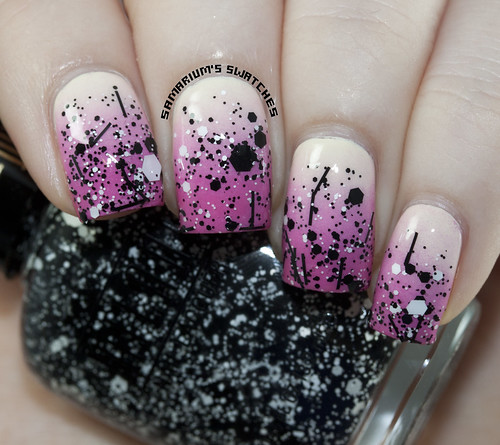
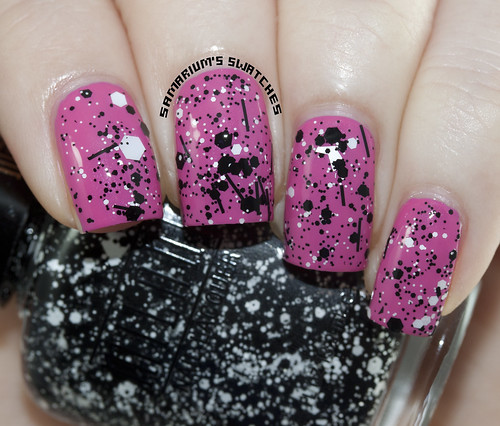
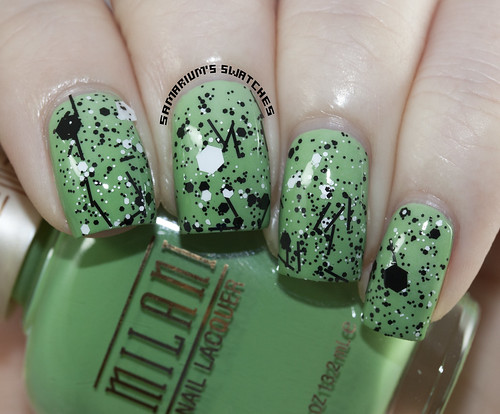
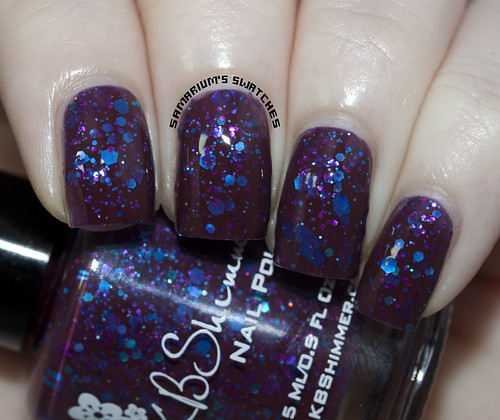
Carnival - One coat with dabbing/placing over Scarlet Ibis.

Milani Carnival (2)
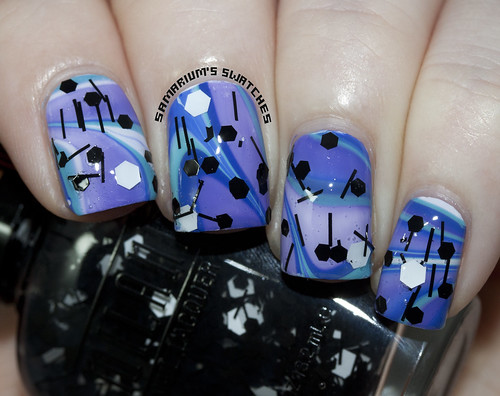
Carnival - One coat with dabbing/placing over a Blue Jay, Peacock & Purple Martin watermarble.

_______________________________________________________

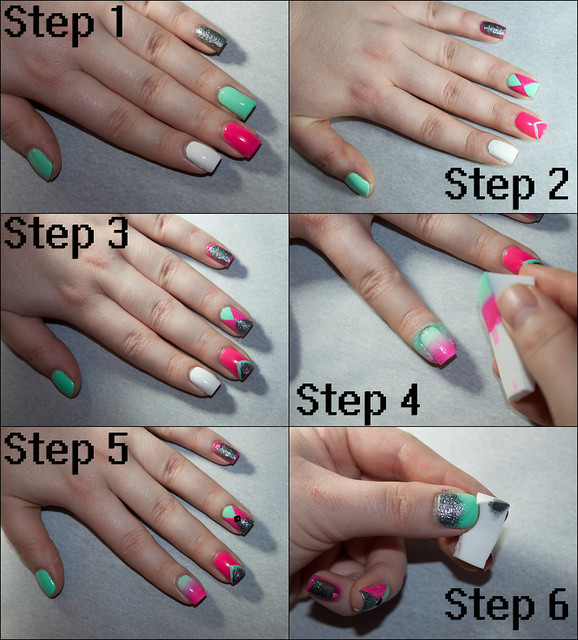
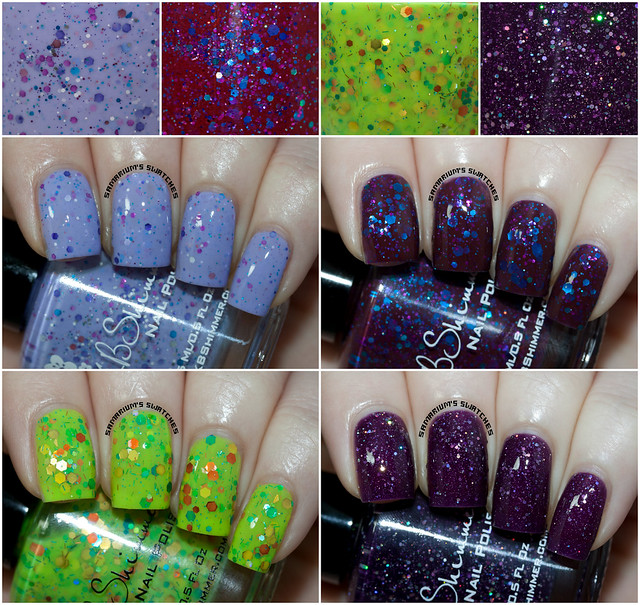
As you can see I tried  a watermarble for the first time in over a year!
I used a white base (Milani White on the Spot) and Blue Jay, Peacock and Purple Martin!
The bubbling was fromt he topcoat and I think also from placing the glitters.

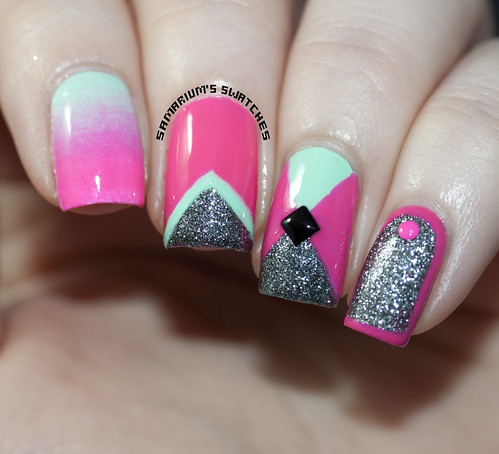
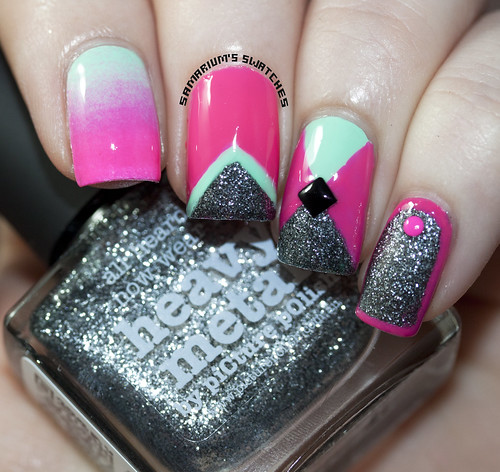
Overall I think this is a very fun collection with great colors!
Blue Jay is my favorite because I'm a sucker for blues!
Purple Martin and Blue Jay had the best formula's but all the cremes are pretty and applied pretty good.
Some were a little streaky and I felt they required three coats, mostly Canary and that is common in yellows.

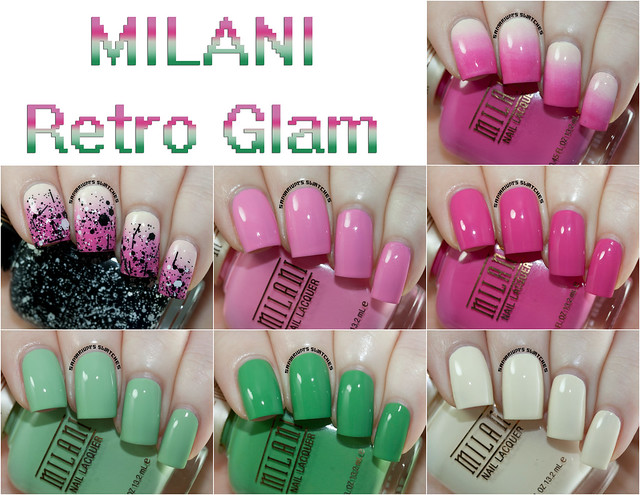
I would pass on Carnival though, it's a pain to apply and if you want a B&W glitter topper
I recommend Sprinkles from the Milani Retro Glam Collection instead!


You can purchase Milani polishes from http://www.milanicosmetics.com/
And at select CVS and Meijer during August!


Follow Milani on FacebookTwitter and Instagram!
Milani Fantastical Plumage


What are your thoughts on this collection? Are you going to pick it up?
*Products in this post were sent to me for the purpose of a 100% honest unbiased review.*

Monday, July 29, 2013

piCture pOlish Blogfest 2013!

Hey guys! It's that time of year again - piCture pOlish Blogfest!!
This year everybody will be doing nail art with the shades provided,
I can't wait to see what everyone comes up with!!

piCture pOlish Blogfest 2013 Nail Art (1)

Here is the nail art look I came up with! But before I get into how I made this look,
and my very first video tutorial attempt These are the three shades I used!

piCture pOlish Heavy Metal
Heavy Metal  - Two coats.
piCture pOlish Honey Dew
Honey Dew - Three thin coats.
piCture pOlish Hot Lips
Hot Lips - Three very thin coats over White.
_______________________________________________________

Here is my tutorial, my very first one so yeah it's super far from perfect!
There is also a pictorial thing below int his post!


IMG_2086
Here is everything I used!

piCture pOlish Blogfest2013 Tutorial


  • Step 1 -
    Start with nail strengthener and base coat. I used Nailtek II and Orly Bonder.
    Then apply your base colors. I used Honey Dew on my ring & thumb nails.
    I applied a white base to my pointer, Hot Lips on my middle nail, and Heavy Metal on my pinky nail.
  • Step 2 -  
    Frame your pinky nail using Hot Lips and a small nail art brush.
    Draw a X shape on your ring nail using Hot Lips, then fill in the sides.
    Draw a triangle on your middle nail using Honey Dew.
  • Step 3 -
    Reapply Hot Lips to your "framed" pinky nail and the sides of the X on your ring nail for opacity.
    Using a small nail art brush and Heavy Metal, fill in the triangle areas on your middle & ring nails.
  • Step 4 - 
    Apply Honey Dew and Hot Lips to a wedge makeup sponge and apply to your white pointer nail.
    Repeat this process 3-5 times until your desired look is acquired!
  • Step 5 -
    Using top coat and a wax pencil (or whatever you use to pick up studs and rhinestones)
    pick up the studs one at a time and apply to your pinky and ring finger nails.
    I used a 2mm circle neon pink stud on my pinky nail and a 2mm black square stud on my ring nail.
  • Step 6 - 
    Use a small clean portion of the same wedge sponge you used above and dab Heavy Metal
    onto your thumb nail. Once dry apply topcoat to all of your nails and you are good to go!

piCture pOlish Blogfest 2013 Nail Art (2) piCture pOlish Blogfest 2013 Nail Art (3) piCture pOlish Blogfest 2013 Nail Art (6)


Make sure to follow piCture pOlish!
See other Bloggers Blogfest mani's on the Pinterest board here!

You can follow piCture pOlish via Facebook, Twitter, Pinterest, YouTube & Instagram!

To learn more about piCture pOlishes Shipping Policies, Network, and Deals check out https://www.picturepolish.com.au


*Products in this post were sent to me from piCture pOlish.*

Saturday, July 20, 2013

Milani Retro Glam Collection - Swatches & Review!

Hey guys! Today's post is featuring six new Limited Edition Milani Nail Lacquers!
This is a really cute collection, it makes me think of spring!

*Products in this post were sent to me for the purpose of a 100% honest unbiased review.*
Milani Retro Glam Gradient
Gradient done with Almond Kiss, Strawberry Shake, and Raspberry Delight.

Milani Gradient with Sprinkles
Then I topped the gradient with one coat of Sprinkles.

Milani Strawberry Shake
Strawberry Shake - Three coats.

Milani Raspberry Delight
Raspberry Delight - Three coats.

Milani Sprinkles (2)
Raspberry Delight topped with one coat of Sprinkles.

Milani Creamy Pistachio
Creamy Pistachio - Three coats.

Milani Mint Chip
Mint Chip - Three coats.

Milani Sprinkles (1)
Gradient with Creamy Pistachio & Mint Chip topped with Sprinkles.

Milani Almond Kiss
Almond Kiss - Three coats.

_______________________________________________________

Okay so this collection is really pretty and I love the colors they chose for it!
They make me want to do flower nail art with em!
All of them except for Sprinkles required three coats for me.


The formula's on Mint Chip and Raspberry Delight were the best of the cremes!
The other creams did go on pretty streaky, nothing that a third coat can't level out though.

 I think it's definitely worth mentioning because some people can't apply nail polish very evenly.
 Streaky polishes can exacerbate uneven application.

Sprinkles is so great! Even though I own quite a few B&W glitter polishes I just love this!
It had really great coverage with one coat (it may need a day here or there)
It applies great and looks good over any and all colors!


You can purchase these Milani polishes from http://www.milanicosmetics.com/
And at select CVS and Meijer during August!

Follow Milani on Facebook, Twitter and Instagram!
Milani Retro Glam

What are your thoughts on this collection?

*Products in this post were sent to me for the purpose of a 100% honest unbiased review.*

Friday, July 19, 2013

Mint Mani for Talia Joy

Hey guys today's post is to remember and honor Talia Joy,
 I won't have a lot of time to post this week but I made time to do this for Talia!
For those who do not know who she is her YouTube channel is here.
To be honest I didn't hear about her until a while ago but she was a really strong, talented and inspirational person.

I'm watching my two nephews while my sister is away at comic con so posting will be a
little sparse this week but will be back to normal soon :)

For this mani I used Sally Hansen Mint Sorbet, and some neon studs I bought recently from Born Pretty.
Mint Sorbet was a bit streaky at first but leveled out nice at three coats.

Sally Hansen Mint Sorbet (2) Mint Mani for Talia Joy Sally Hansen Mint Sorbet


Tuesday, July 16, 2013

Comic Con Geek Week Nail Art - Portal Nail Art

Okay so were supposed to be on Day 2 I did these super late last night and couldn't post on time :(
I will try to catch up but I'm not sure I will have time to even finish this challenge since my nephews will be here soon and I'm going to be watching them while my sister is at Comic Con, but I will try!
Gives me a chance to do nail art that I already plan to do anyway!


For day one I decided to do a game mani, since I don't read very often anymore.
It was hard to decide between WoW, Bioshock and Portal! I chose Portal, seemed easiest and I was tired!

Portal Nails Portal Nail Art

So I didn't do the greatest job, I was sleepy.
The pink used was China Glaze Dance Baby and the grey is Zoya Kelly. The rest is acrylic paint.

My mani includes the Portal logo, a test subject jumping through a portal, Companion Cube, a turret and the cake is a lie (yeah the cake doesn't look great lol)

Now I need to decide which TV show to do nail art for and hope I can get to that asap! :)


Monday, July 15, 2013

Contrary Polish Color Context Trio - Swatches & Review!

Hey guys! Today's post is the new Collection/Trio from Contrary Polish!!
I'm loving these rich colors, I know summer is mostly about brights but I miss the deep shades!
And be sure to go check out her anniversary polish Gift Wrap!

*Products in this post were sent to me for the purpose of a 100% honest unbiased review.*
Contrary Polish Blood Orange

Blood Orange - Three thin coats.
"Red base with gold shimmer; overall polish has an orange tint"


Blood Orange is a gorgeous rich jelly-ish red that I think will look great on all skin tones.
The gold shimmer makes the polish appear to have a orange sheen.

Contrary Polish Greenhouse

Greenhouse  - Three thin coats.

"Blue base with gold shimmer; overall polish looks green"


Greenhouse is super interesting! It's a blue teal-ish base with tons of green shimmer.
It has so much shimmer that it basically looks green!

Contrary Polish Indigo Rose

Indigo Rose - Three thin coats.

"Blue base with red-orange shimmer; shimmer appears red-purple
and gives overall polish a purple tint"


The red-orange shimmer makes Indigo Rose appear purple instead of the blue base color, it's really neat!

_______________________________________________________

All three of these polishes are crazy gorgeous, even more so in person!
My flash on camera made them look a bit sheer whereas in person it didn't look sheer whatsoever.
Indigo Rose is probably my favorite, it's so unique! But Greenhouse and Blood Orange are killer too!
I wore greenhouse for four days and then took it off today to swatch but I had zero chips and very minor tip wear!
Contrary Polish makes the best shimmers, if you haven't checked out her polishes than you definitely should!
Especially for those who want to try indies but dislike glitter bombs!
All of the Contrary Polishes I have tried have all had impeccable formula's and these were no exception!
They apply very evenly and smoothly, they aren't too funny so you don't have to worry about flooding your cuticles but they aren't too thick either. Seriously top notch formulas!

Contrary Polishes are available for purchase from the following websites:

 Llarowe
Norway Nails
Shoppe Eclecticco
Femme Fatale Cosmetics

You can also order mini's directly from her through her blog.


Follow Contrary Polish on Facebook and Twitter!

Contrary Polish Collage

What do you guy think of this collection? Have you tried Contrary Polish?


*Products in this post were sent to me for the purpose of a 100% honest unbiased review.*

Saturday, July 13, 2013

KBShimmer Swatches & Review - Part Two

Hey guys, today's post is Part Two with four more stunning polishes from KBShimmer!
Check out part one here!

*Products in this post were sent to me for the purpose of a 100% honest unbiased review.*
Kbshimmer Part 2 Kbshimmer Iris My Case
Iris My Case - Three coats.
Iris My Case applied great, the glitters disperse perfectly and the formula was smooth.

"Iris, Lilacs, Violets are some of of the most beloved flowers  come spring, this pastel violet colored polish was inspired by all three.   The soft purple base is filled with glitters in pink, purple, white, periwinkle  and blue. If you are not a fan of large glitters, this polish is for you."

Kbshimmer No Whine Left
No Whine Left - Three coats.
Gorgeous, the blue glitters in No Whine Left really pop in the plum base!
Application was easy, a little streaky on the first coat but it evened out perfectly.

"A deep plum, almost burgundy wine color, this polish is  loaded with blue, aqua, fuchsia, and purple hex glitters in several sizes. The  glitters in this polish seem to pop out in different lights, adding a fun depth  to it.  This polish is more of a “crelly”, a cream with jelly  properties."

Kbshimmer Toucan Touch This
Toucan Touch This - Three coats.
I really love the mini bar glitters in this! Plus the color!
The glitters will pull if you don't let it dry in between coats but it applies very evenly.

"A chartreuse base, almost lime green in color starts  this bold polish out. Gold, green, teal, blue, and orange hex glitters, some  holographic and a fun punch. Micro teal, orange and blue bars are accented by  micro orange glitters.  The bar glitter is micro fine, and adds a sparkle  to the polish without the troubles of normal bar glitter."  

Kbshimmer Witch Way
Witch Way? - Four coats. (I used very thin coats)
I felt like it needed the fourth coat but I apply coats very thin.
The formula on this applied super evenly and just so easy. I love this one so much!!

"After midnight, a full moon is lighting the night sky making it almost purple in color. Stars in different sizes sparkle and shine, like diamonds. This polish, with its deep grape color is full of holographic glitters made to mimic those diamond like stars." 

_______________________________________________________

Just like I said yesterday there is not a KBShimmer I own that I've been disappointed with,
hands down in my top ten favorite indies for the creativity and formulation.
I don't remember ever having to dab or place glitters with any of them, they just go on great!
My favorite of these for is Witch Way! Even being a little sheer it just has so much depth and is stunning.


You can purchase KBShimmer polishes from https://www.kbshimmer.com/ for $8.75 ea.
Along with many other nail, cuticle and body products!
You can also purchase KBShimmer polishes from Etsy and Harlow & Co.


To stay up to date with KBShimmer follow via FacebookInstagram & Twitter!

Kbshimmer  Collage

What do you guys think of these? Do you own any?
What is your favorite KBShimmer or biggest KBShimmer lemming?


*Products in this post were sent to me for the purpose of a 100% honest unbiased review.*